Follow the steps carefully to connect your WhatsApp Cloud API with Clorofile ERP and enable real-time messaging.
1: Create a Facebook Developers Account
- Login to your Facebook account and visit Facebook Developers. Click Get Started.
- Enter your phone number for verification.
- Choose Developer role.
.png)

.png)

.png)
2: Create a Facebook App
1. Click Create App.
.png)
2. Choose Business as app type.
.png)
3. Provide business information and app details.
.png)
4. Navigate to WhatsApp product → Click Set Up.
.png)
5. Accept WhatsApp Terms.
.png)
6. Send a test message.
.png)
3: Connect Your Phone Number
1. Click Add Phone Number.
.png)
2. Fill business information and click Next.
.png)
3. Add a WhatsApp number (must not be linked to existing WhatsApp).
.png)
4. Verify phone number using 6-digit code.
.png)
5. Confirm phone number is connected.
4: Webhook Configuration
1. Head to Configuration in WhatsApp Module Settings
.png)
2. Click Edit Webhook.
3. Enter the Webhook URL and use a Verification Token (you will later need to add it in the module's settings).
.png)
4. Subscribe to the following critical webhook events for a complete WhatsApp integration:
| Event Name | Purpose |
| messages | Receive incoming and outgoing WhatsApp text, media, and interactive messages. |
| message_status | Track the delivery status of messages (delivered, read, failed, etc.). |
| message_template_status_update | Get updates on the approval or rejection status of your message templates. |
| account_review_update | Get notified when your WhatsApp Business Account undergoes review or status changes. |
| phone_number_name_change | Receive alerts when your connected phone number's display name is changed. |
| template_category_update | Monitor changes to template categories (marketing, transactional, etc.). |
| template_quality_update | Track the quality rating (green/yellow/red) of your message templates. |
✅ Important Note: Subscribing to these events ensures you:
- Receive real-time new messages and delivery receipts
- Monitor your template status and quality
- Track account and phone number changes proactively
.png)
Step 5: Generate a Permanent Access Token
1. Go to Meta Business Manager
2. Navigate: Business Settings → Users → System Users → Add (Create a System User).
3. Assign a name and select Admin role for the System User.
.png)
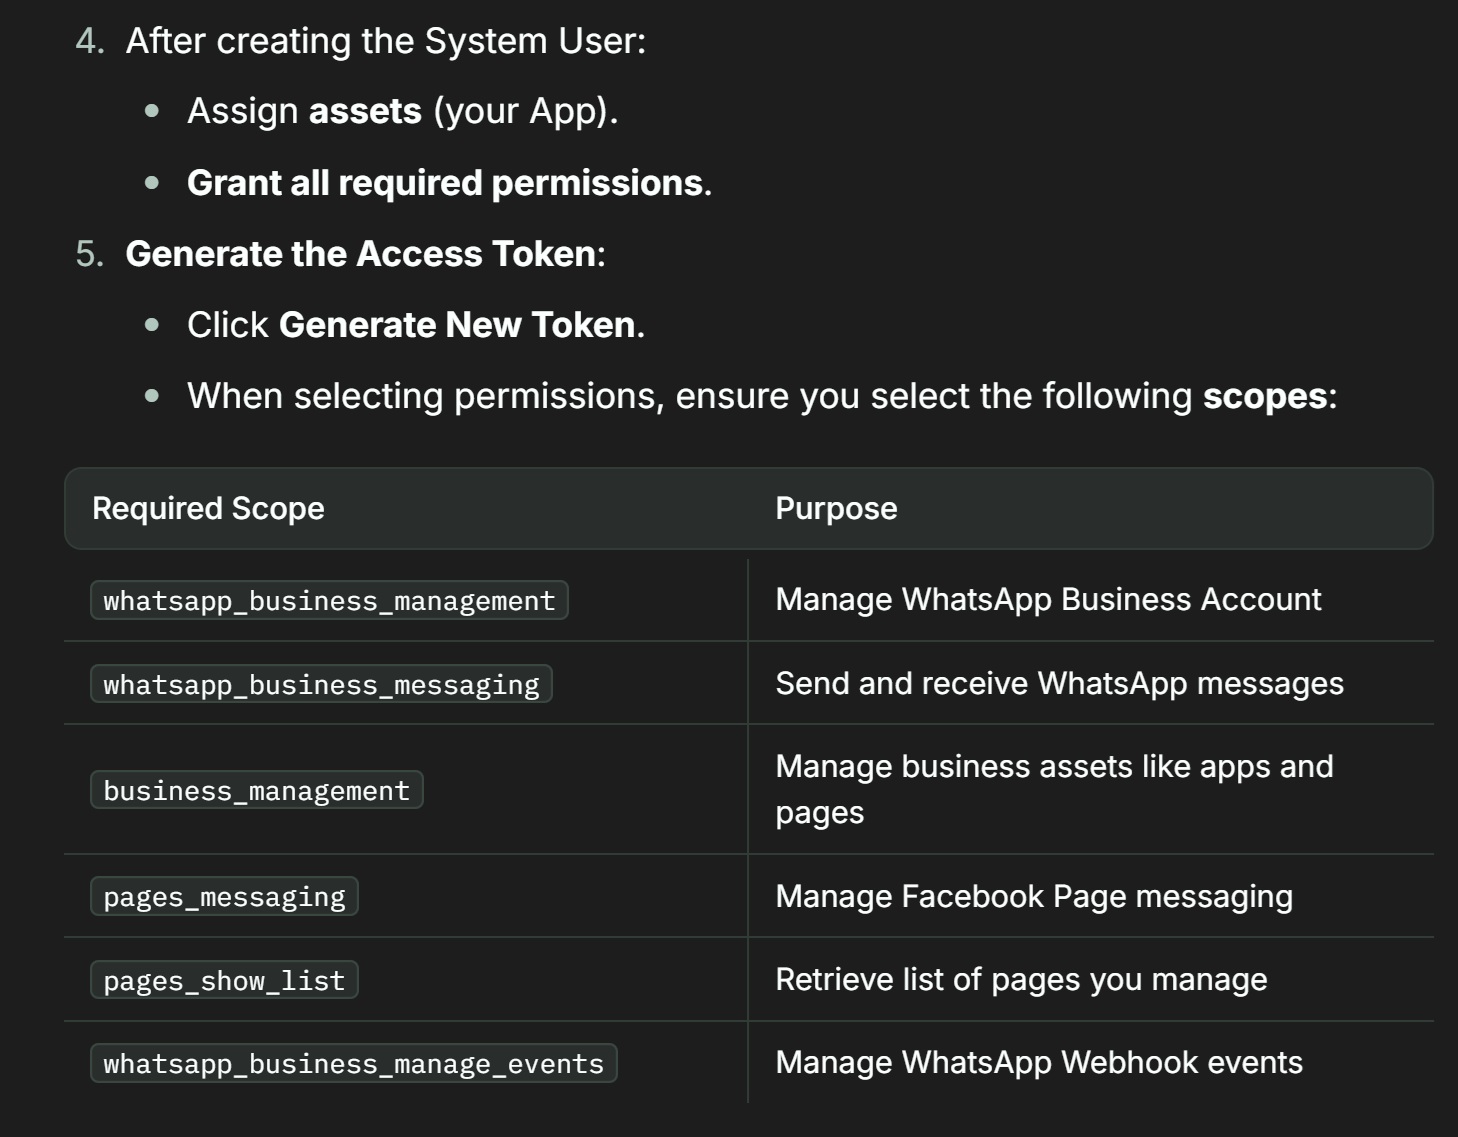
✅ Important Note: These scopes must be selected for successful WhatsApp API integration and automated webhook management.
.png)